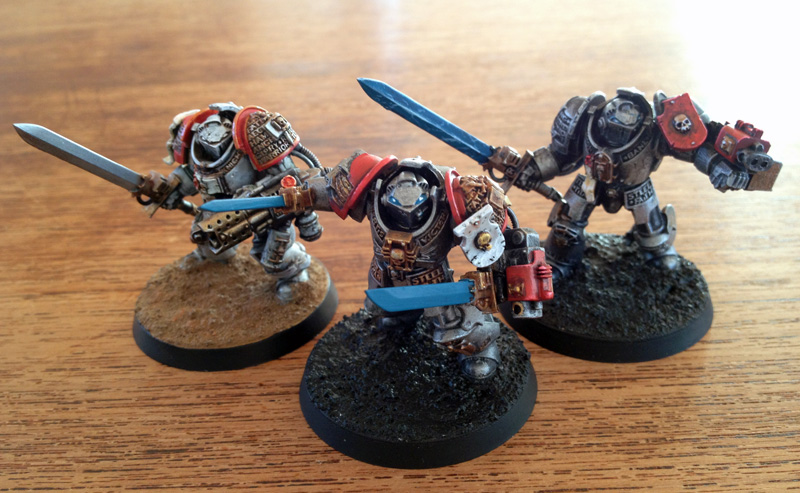
Collaborative work between my son and myself. Well, I did the white Grey Knight to the left last year. But over the past 2 weekend my son has painted the two others drybrushing the metal in two stages, and painting in the gold, the basic dark red, and the basecolour for the powerweapons. He also painted the white shield, added a wash to the gold, followed by a drybrush of silver/gold-mix. I helped out with highlights on the red, some lightning effect on the long blade, painting eyes, and detail-work on the white shield. So a lot of help, but certainly also a lot of stuff done by himself. But the best thing was enjoying the process and sensing how proud and happy he was when he had the finished model to move around on the table.
These are his models number 4 and 5. And we still need to do the bases. However, I'll be assembling the remaining two models over the next weeks for the squad to get gaming-ready! Currently the 3 mighty Grey knights are fighting 4th edition High Elves and a half painted Wood Elves Dragon...


What did you use for the bases? Works really well!
ReplyDeleteHi Irwit, the base deco is just sand glued on with PVA-glue. When dry I usually give it a second watered-down coat of glue to get sand to stick together and not just to the base. This also helps to get a more scorched-earth-like look.
ReplyDeleteThat extra layer of PVA really helps change the sand look to something with a bit more substance and realism. Thanks for sharing :)
ReplyDeleteI miss your mini´s ;-) But as we all know there are other things in life too, but I am still looking forward to seeing what you will dish out in 2014. Happy New Year Jacob, and thanks for all the inspiration ;-D
ReplyDeleteI hope you don't mind, but I referred to your blog in my blog (www.miniature-studio.com) - happy new year! :)
ReplyDelete